Updating Linux boot image migrating from VMWare to Hyper-V

<code class="hljs python"><span class="hljs-comment"># CentOS 5 regenerate initrd for Hyper-V</span>
mkinitrd -f -v --<span class="hljs-keyword">with</span>=hid-base-hv --<span class="hljs-keyword">with</span>=hid-hyperv --<span class="hljs-keyword">with</span>=hv_utils --<span class="hljs-keyword">with</span>=hv_vmbus --<span class="hljs-keyword">with</span>=hv_storvsc --<span class="hljs-keyword">with</span>=hv_netvsc /boot/initrd-$(uname -r).img $(uname -r)
 
<span class="hljs-comment"># CentOS 6 regenerate initramfs for Hyper-V</span>
mkinitrd -f -v --<span class="hljs-keyword">with</span>=hid-base-hv --<span class="hljs-keyword">with</span>=hid-hyperv --<span class="hljs-keyword">with</span>=hv_utils --<span class="hljs-keyword">with</span>=hv_vmbus --<span class="hljs-keyword">with</span>=hv_storvsc --<span class="hljs-keyword">with</span>=hv_netvsc /boot/initramfs-$(uname -r).img $(uname -r)</code>

<code class="hljs python"><span class="hljs-comment"># CentOS 7 regenerate initramfs for Hyper-V</span>
mkinitrd -f -v --<span class="hljs-keyword">with</span>=hid-hyperv --<span class="hljs-keyword">with</span>=hv_utils --<span class="hljs-keyword">with</span>=hv_vmbus --<span class="hljs-keyword">with</span>=hv_storvsc --<span class="hljs-keyword">with</span>=hv_netvsc /boot/initramfs-$(uname -r).img $(uname -r)</code>


Change Exchange Smart Host Port

By default, an Exchange server will try and send emails to a smart host using port 25. Unfortunately, there is no option to change the port number within the Exchange Management Console. This howto guide will show you how to change this to a different port number. This will be done using the Exchange Management Shell.

Note: Changing this setting will effect all traffic going through a send connector, so if you change it back to using DNS, it will try to connect to all mail servers on the specified port. This should stay as port 25, so only change this option when using a smart host, and the smart host requires you use a different port (eg, port 587).

Find out the identity of the send connector that you want to change the port number on.

Run the following command to get a list of the send connectors:

Get-SendConnector

Use the relevant “Identity” name from the above output, and use the “Set-SendConnector” command as follows to set which port to use:

Set-SendConnector -identity "External Mail" -Port:587

This will set the send connector to sent emails to the smart host using port 587.


View current port setting:

If you want to find out which port is currently being used, you can use the following command:

Get-SendConnector -identity "External Mail" | Format-List

This will output the “Port” as one of the settings.


Adding a random signature to Outlook 2013

I was looking for a way to have a random signature in my mail (outlook). I didn't think I should need to resort to a full blown plugin/download to just do this simple task.

You can do this via the Developer tab in the Office Outlook client. If you dont have the developer ribon active you will have to enable it. You can do this via Options -> Customize Ribbon -> Tick the "Developer" checkbox and click OK. After adding it, go to the developer ribbon and click the "Visual Basic" button to go to the devekioer editor. Paste the following script in the "ThisOutlookSession" file.

Sub Application_ItemSend(ByVal Item As Object, Cancel As Boolean)
	If Item.Class &lt;&gt; olMail Then Exit Sub 'Make sure it's a send mail
    Const SearchString = "%Random_Line%"
    Const QuotesFile = "d:\quotes.txt" ' Path to file containing a quote per line

    If InStr(Item.Body, SearchString) Then
        If FileOrDirExists(QuotesFile) = False Then
            MsgBox ("Quotes file not found!")
            Cancel = True
        Else
            Dim lines() As String
            Dim numLines As Integer
            numLines = 0
 
            ' Open the file for reading
            Open QuotesFile For Input As #1
 
            ' Go over each line in the file and save it in the array + count it
            Do Until EOF(1)
                ReDim Preserve lines(numLines + 1)
                Line Input #1, lines(numLines)
                numLines = numLines + 1
            Loop
            Close #1
 
            ' Get the random line number
            Dim randLine As Integer
            randLine = Int(numLines * Rnd()) + 1
 
            ' Insert the random quote
            Item.HTMLBody = Replace(Item.HTMLBody, SearchString, lines(randLine))
        End If
    End If
End Sub
 
Function FileOrDirExists(PathName As String)
    Dim iTemp As Integer
 
    On Error Resume Next
    iTemp = GetAttr(PathName)
 
    Select Case Err.Number
    Case Is = 0
        FileOrDirExists = True
    Case Else
        FileOrDirExists = False
    End Select
 
    On Error GoTo 0
End Function

This will replace the phrase %Random_Line% with a random line from the text file. If it can't open the text file it will not send the email out. Now you just need to edit your signature and place %Random_Line% where you like.


mpt-statusd: detected non-optimal RAID status

I have noticed that mpt-status gets installed by default in Debian 7 Wheezy when running on VMware. Since the virtual machine does not use RAID mpt-statusd reports "non-optimal" RAID status in the log every 10 minutes.

mpt-statusd: detected non-optimal RAID status

The mpt-status package is used to query the status of LSI SCSI HBAs so unless your machine is using such HBA cards the mpt-status package should be safe to remove.

sudo service mpt-statusd stop
sudo apt-get purge mpt-status


Installing RALUS client on Debian with 3.0 kernel

1. Unpack the archive provided by Symantec

  • tar xzf RALUS_RMALS_RAMS-2896.9.tar.gz

2. Stop the RALUS service if it is already installed and runnig

  • /etc/init.d/VRTSralus.init stop

3. Very important, if you are under a 64 bit Linux you have to this

  • Extract debian package :
    tar xzf RALUS64/pkgs/Linux/VRTSralus.tar.gz
  • Install debian package :
    dpkg -i VRTSralus-13.0.2896-0.x86_64.deb
  • Start installation :
    ./RALUS64/installralus
  • If you get "./installralus: line 50: ../perl/Linux/bin/perl: No such file or directory", simply edit ./RALUS64/installralus, and change line 50 :

  • from:

    • if [ $LOCAL_PERL -eq 1 ] ; then
        ../perl/$OS/bin/perl -I.. -I$PATH -I$VXIF_HOME -I../perl/$OS/lib/$PERL_VER ./installralus.pl $*
      else
        perl -I.. -I$PATH -I$VXIF_HOME ../installralus.pl $*
      fi
    •  
      to:
      #if [ $LOCAL_PERL -eq 1 ] ; then
      # ../perl/$OS/bin/perl -I.. -I$PATH -I$VXIF_HOME -I../perl/$OS/lib/$PERL_VER ./installralus.pl $*
      #else
        perl -I.. -I$PATH -I$VXIF_HOME ../installralus.pl $* 
      #fi
      C) If the installation is sucessful but VRTSralus refuses to start, launch /opt/VRTSralus/bin/beremote –-log-console to see the error.

    If you get error while loading shared libraries: libstdc++.so.5: cannot open shared object file: No such file or directory you simply need to install the package :

    • Under Debian : apt-get install libstdc++5

      However the service will fail to start afterwards.

Change into ralus directory
#cd /opt/VRTSralus/bin

Make a backup of libbesocket.so
#cp libbesocket.so libbesocket.so.orig

Install objdump
apt-get install binutils binutils-multiarch

Disassemble the binary to a file
#objdump -D libbesocket.so > libbesocket.asm

Open file and search for ‘$0x8938?

#nano libbesocket.asm
Type ctrl+w to search
Type '$0x8938' and press enter

Find the following lines and locate the hex highlighted in red in front of the jump-no-sign instruction.
In my case it happens to be ’79 19?.

23840:       31 c0                   xor    %eax,%eax
23842:       be 38 89 00 00          mov    $0x8938,%esi
23847:       e8 2c df fe ff          callq  11778 <ioctl@plt>
2384c:       85 c0                   test   %eax,%eax
2384e:       79 19                   jns    23869 <_Z10getifaddrsPP7ifaddrs+0xb9>
23850:       e8 d3 df fe ff          callq  11828 <__errno_location@plt>
23855:       83 38 16                cmpl   $0x16,(%rax)
23858:       0f 85 40 03 00 00       jne    23b9e <_Z10getifaddrsPP7ifaddrs+0x3ee>
2385e:       c7 84 24 ec 00 00 00    movl   $0x20,0xec(%rsp)

Install hex editor and open the file

#apt-get install hexer
#hexer libbesocket.so

Search for the hex we found earlier

Type '/' to search
Type '\xx 79 19' and press enter

NOTE: Only change the code where the hex matches the preceeding chunks of code in the middle column earlier in that exact order. This is what my line looked like.
00023840:  31 c0 be 38 89 00 00 e8  2c df fe ff 85 c0 78 19  1..8....,.....x.

Using arrow keys move cursor into position and change value from ’79’ to ’78’

Type 'r' to edit
Type '78' and press enter
Type ':wq' and press enter to quit while saving

Now go and start the service
/etc/init.d/VRTSralus.init start


Planning The Repeater

In my last post I talked about the middle point of my link having to be a repeater. It also doesn't have any power to this location so I calculated out my power requirments and tower requirments and have gotten to work. I priced some pre-made truss towers and found them to be very expensive.
I looked into doing a 50mm pole with guy-wires but the base would have needed to be 6 meters square.
I decided to make my own truss tower. I ordered some 50mm heavy walled black pipe, and sourced some pre made 12mm solid pre bent webbing.

My TODO list: 
Going to need a tower, anything under 8 meters in my area doesn't require a permit. Actually putting in something around 8 meters is going to be a bit of a struggle without a crane, so need to think a little smaller. 50mm black pipe comes in 6.5 metre lengths.
6.5 - minimum depth to support X length tower.
This calculates out to putting at least 1 metre into solid concrete.
I will design the tower to be 5.3 meters in height, allowing 1.2 meters in the ground.

Concrete requirements will be a minimum of 900x900x1200mm which is around 0.972 of a cubic meter. I will flared out the bottom of the hole so I'll work to making up 1.1-1.2 cubic meters of concrete.
Can't get a cement mixer up the hill it's too steep, so this will have to be a manual job. sigh

Tower requirments:
1 x PTP (point-to-point) antenna.
2 x 120 degree MIMO antenna's (with the option for a 3rd to cover full 360 if needed).
Solar panel(s), batteries, mppt charge controller, small switch to connect the radio gear, something that supports IEEE802.1Q (vlan), would like to go a small managed switch with minimal power requirments.
Circuit breakers to ensure everything plays nice.
Shielded CAT6 cabling, lighting protection and earthing equipment.
The tower is after all sitting up on the ridge line of a hill.

Steel frames to hold the solar panel(s) and a box to put the batteries and gear in.

Antenna choice:
I like the Ubiquiti equipment and have heard good things about the equipment.
For connectivity from the base station to the repeater tower link I have chosen the "Ubiquiti NanoBeam M5-19 NBE-M5-19" to go at each end. On the repeater tower I have chosen to use 2 x "Ubiquiti airMAX 5GHz 19dBi AM-5G19-120" antenna using the "Ubiquiti Rocket M5 802.11a/n 500mW" radio's.

NBE-M5-19
Frequency 5GHz
Throughput 150+ Mbps
Range 15+km
AM-5G19-120
Frequency 5 GHz
Gain 19 dBi
M5
Frequency 5 GHz
Throughput 150+ Mbps
Ports (1) 10/100 Ethernet

Powering the devices:
After much reserach I picked out an MPPT controller from ebay. I had heard of several people being burn't buying an mppt controller from ebay only to find it's a cheap pwm knock off. Once I sourced the one I wanted I requested some images of the circuit boards and ensured I was getting the right controller. I ended up going with an i-Panda (yeah I know a chinese one) it's a 12/24/48V 30A charge controller. 
 
For the solar panels I sourced some 2 x JA Solar (JAP6-60-260/3BB) 260W Solar panels. The batteries I have chosen are 125AH 12V AGM Deep Cycle. I have gone with 2 of them to either run the system at 24V or go with 12V I will test once it's up and running which way I will configure it. 

 So the above covers the power generation  and power storage. The MPPT controller will output 12V (for my initial testing) but can be switched to 24V if I need too.


"The Last Kilometre" or in my case the last 6 or so.

Getting "The Internet" to my place.
Due to the aging copper in the ground and distances from local exchanges I'm not able to obtain an ADSL connection. (quite a funny statement in todays age.)
There was some hope with the NBN (but lets not go there now).

So this left me with planning out a way to get reliable/fast internet connectivity to my house. I pondered the idea of running my own fibre, this would end up being a very expensive install. I looked into satellite but found that it is not very fast. I am currently using mobile connectivity which is usable, not overly fast, costs a fortune once you start actually wanting to use the data. Having a little bit of knowledge about "the internet" I decided to roll my own wifi link. I initially looked at trying to connect back to the exchange that my phone line currently terminates too. Upon learning that it is only ADSL1 capable I ruled that out as an option.
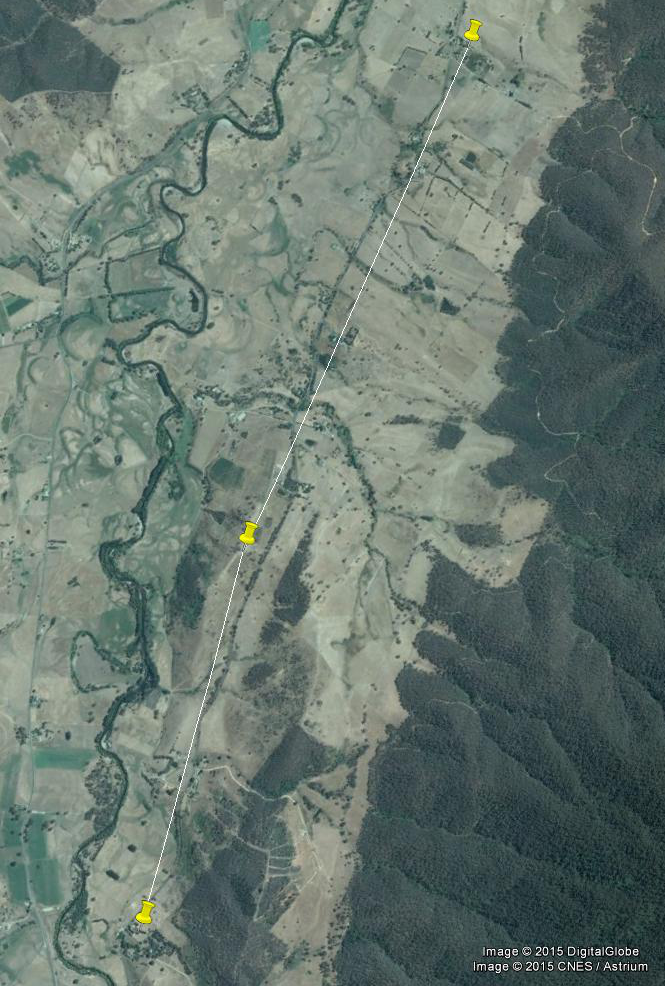
This had me looking in the other direction to the next nearest exchange, as luck would have it the exchange in the opposite direction supports ADSL2+. Spending sometime on google earth mapping out links from A to B, getting rather disheartened to learn I'm up for more then just an A to B (going to need a C) I finally mapped out a path to bring an internet connection to my home/office. Thanks to the wonderful people in my local community I approached my neighbours and they were more then happy to allow me to place the equipment I need on there shed/paddock/etc to setup my wifi link. So below is the proposed path.

(click for larger version)

I marked out the path and checked my elevations for the 2 paths. Path 1 will be around 4km's from the base station to the repeater. Path 1 rising around 123meters.

(click for larger version)

Path 2 will be around 2.7km's from the repeater to my house. Path 2 rising around 124meters.

(click for larger version)

With my binoculars in hand I went for a walk to all 3 locations and made sure I had a clear line of sight to all spots.  Now I need to plan what I will need to put at the middle location, as it has no power and will end up on the small ridge of a hill. 

Stay tuned I'll update my initial plans as I get time to write it all down.


Downloading a website using wget with auth and ssl TEST

First off issue the login and store the session cookie.

 wget --no-check-certificate \
--save-cookies cookies.txt \
--keep-session-cookies \
--post-data 'username=user&amp;password=pass&amp;remember=1&amp;Submit=Login' \
https://some.web.site.com

Then we request the page we wish to download and follow.

 wget \
 --load-cookies cookies.txt \
 --keep-session-cookies \
 --save-cookies cookies.txt \
 --reject *index.php*,*whoson.php* \
 --no-check-certificate \
 --recursive \
 --no-clobber \
 --page-requisites \
 --html-extension \
 --convert-links \
 --restrict-file-names=windows \
 --domains some.web.site.com \
 --no-parent \
https://some.web.site.com


Converting MyISAM to InnoDB

Run this SQL statement in the mysql client, Naivcat, or wherever) to retrieve all the MyISAM tables in your database. Replace value of the name_of_your_db variable with your database name.
SET @DATABASE_NAME = 'name_of_your_db';
SELECT CONCAT('ALTER TABLE `', table_name, '` ENGINE=InnoDB;') AS sql_statements
FROM information_schema.tables AS tb 
WHERE table_schema = @DATABASE_NAME 
AND `ENGINE` = 'MyISAM' 
AND `TABLE_TYPE` = 'BASE TABLE' 
ORDER BY table_name DESC;
Then, copy the output and run as a new SQL query.


Setting up a clustered MariaDB with Keepalived and HAProxy on debian 7 wheezy

This setup with utilize 5 servers. (you can get away with 4 but do your research on a 2 node MariaDB cluster) I'm using 3 freshly minted VM machines running debian 7 wheezy.

Cluster Node 1
hostname mariadb-00
IP address 10.0.10.10

Cluster Node 2
hostname mariadb-01
IP address 10.0.10.11

Cluster Node 3
hostname mariadb-02
IP address 10.0.10.12

Step 1 - Setting up MariaDB Servers Adding the MariaDB repository and installing the prerequisites

apt-key adv --recv-keys --keyserver keyserver.ubuntu.com 0xcbcb082a1bb943db
add-apt-repository 'deb http://mirror.aarnet.edu.au/pub/MariaDB/repo/10.0/debian wheezy main'
apt-get update
apt-get install python-software-properties rsync
apt-get install mariadb-galera-server galera

Step 2 - Setting up MariaDB security The default installation is not very secure so we can improve on that. Start the mysqld service (yes MariaDB is still called mysql) on all nodes.

service mysql start

Next we need to run the mysql_secure_installation script so we can improve the security.

/usr/bin/mysql_secure_installation

Go through the script and note down your new root password if you changed it.

Step 3 – Setup MariaDB Galera Cluster users Now we need to setup some users that must be able to access the database. The ‘sst_user’ is the user which a database node will use for authenticating to another database node in the State Transfer Snapshot (SST) phase. Execute the following command on all nodes:

mysql -u root -p
mysql&gt; DELETE FROM mysql.user WHERE user='';
mysql&gt; GRANT ALL ON *.* TO 'root'@'%' IDENTIFIED BY 'dbpass';
mysql&gt; GRANT USAGE ON *.* to sst_user@'%' IDENTIFIED BY 'dbpass';
mysql&gt; GRANT ALL PRIVILEGES on *.* to sst_user@'%';
mysql&gt; FLUSH PRIVILEGES;
mysql&gt; quit

Please not that the ‘%’ means that the root or sst_user is allowed to access the database from any host. For production make it more secure by specifying the hostname(s) or IP addresses from which those users can access the database. Once the software has been installed, we can create the Galera configuration file: /etc/mysql/conf.d/cluster.cnf

[mysqld]
query_cache_size=0
binlog_format=ROW
default-storage-engine=innodb
innodb_autoinc_lock_mode=2
query_cache_type=0
bind-address=0.0.0.0
 
# Galera Provider Configuration
wsrep_provider=/usr/lib/galera/libgalera_smm.so
#wsrep_provider_options="gcache.size=32G"
 
# Galera Cluster Configuration
wsrep_cluster_name="CLUSTERNAME"
wsrep_cluster_address="gcomm://IPOFNODE,IPOFOHTERNODE"
 
# Galera Synchronization Congifuration
wsrep_sst_method=rsync
#wsrep_sst_auth=user:pass
 
# Galera Node Configuration
wsrep_node_address="CURRENTNODEIP"
wsrep_node_name="CURRNETNODE"

Change the following lines to suit your configuration

wsrep_cluster_name="CLUSTERNAME"
wsrep_cluster_address="gcomm://IPOFNODE,IPOFOTHERNODE"
wsrep_node_address="CURRENTNODEIP"
wsrep_node_name="CURRNETNODE"

Notice that we need to set the IP addresses for the wsrep_cluster_address to match the addresses of our two nodes, then on each node, we set use the local hostname and IP address in the last two lines. Complete all of the above steps on both nodes, and then we should stop the mysql service on both nodes:

service mysql stop

Now we need to copy the contents of /etc/mysql/debian.cnf from node 1 to node 2 (there are some passwords in that file that need to match across both nodes once we’ve got them clustered). Once that’s complete, we can create the cluster. On the first node, we start the mysql service with as special argument to create the new cluster:

service mysql start --wsrep-new-cluster

And on the second node, we start the usual way:

service mysql start

We will need to allow our HAProxy nodes access to the MariaDB servers for health checks. On one of the MySQL nodes, logon to MySQL as root and enter the following:

mysql -u root -p
grant all on *.* to root@'%' identified by 'password' with grant option;
insert into mysql.user (Host,User) values ('192.168.1.30','haproxy');
insert into mysql.user (Host,User) values ('192.168.1.31','haproxy');
flush privileges;
exit

Notice that I specified the IP addresses of my HAProxy nodes, and I used the username ‘haproxy’. We don't' set a password for the haproxy user as it is restricted to your HAProxy hosts only. Setting up HAProxy and keepalived For this configuration, I’ve created two Ubuntu 14.04 servers (mine are virtual servers with two virtual cpus and 1 GB of RAM). You’d probably want to make these bigger in a production environment, depending on the number of concurrent connections you expect. I’ve given them hostnames and IP addresses: haproxy1 (192.168.1.30) haproxy2 (192.168.1.31) We’ll also need to allocate a third IP address to use as the virtual IP address (VIP). We’ll use 192.168.1.32. This will ultimately be the endpoint used to access the OpenStack services that we’ll build later. The first thing we need to do is to let the kernel know that we intend to bind additional IP addresses that won’t be defined in the interfaces file. To do that we edit /etc/sysctl.conf and add the following line: /etc/sysctl.conf

net.ipv4.ip_nonlocal_bind=1

Then we run the following command to make this take effect without rebooting:

sysctl -p

To install HAproxy on Debian Wheezy, you have to go through backports. First add backports in /etc/apt/sources.list :

deb http://ftp.debian.org/debian/ wheezy-backports main

Then install haproxy:

apt-get update
apt-get install haproxy keepalived mysql-client

Next, we define the keepalived configuration by creating the following file: /etc/keepalived/keepalived.conf

global_defs {
  router_id haproxy1
}
vrrp_script haproxy {
  script "killall -0 haproxy"
  interval 2
  weight 2
}
vrrp_instance 50 {
  virtual_router_id 50
  advert_int 1
  priority 101
  state MASTER
  interface eth0
  virtual_ipaddress {
    192.168.1.32 dev eth0
  }
  track_script {
    haproxy
  }
}

Notice there’s a few specific items that we need to set for this. I’ve set the router_id to be the hostname, and I’ve specified the VIP as 192.168.1.32. When you create this file on the second node, make sure to use the hostname of the second node. Next, we will define the HAProxy configuration: /etc/haproxy/haproxy.cfg

global
        log /dev/log    local0
        chroot /var/lib/haproxy
        stats socket /run/haproxy/admin.sock mode 660 level admin
	user haproxy
	group haproxy
	daemon
 
defaults
	log	global
	option	dontlognull
        contimeout 5000
        clitimeout 50000
        srvtimeout 50000
	errorfile 400 /etc/haproxy/errors/400.http
	errorfile 403 /etc/haproxy/errors/403.http
	errorfile 408 /etc/haproxy/errors/408.http
	errorfile 500 /etc/haproxy/errors/500.http
	errorfile 502 /etc/haproxy/errors/502.http
	errorfile 503 /etc/haproxy/errors/503.http
	errorfile 504 /etc/haproxy/errors/504.http
 
listen stats 192.168.1.30:80
        mode http
        option httplog
        stats enable
        stats uri /stats
        stats realm HAProxy\ Statistics
        stats auth admin:password
 
listen galera 103.29.172.121:3306
        balance source
        mode tcp
        option tcpka
        option mysql-check user haproxy
        server em-mariadb-00 103.29.172.124:3306 check weight 1
        server em-mariadb-01 103.29.172.125:3306 check weight 1

Notice that I’ve used the local IP address in the file in two locations, in the global section for the log location, and in the stats listener. When you setup the second node, make sure to use its IP address. Also notice the username and password in the status auth line. Set this to whatever you want. Then, you will be able to access the stats page via your browser. Now we need to enable HAProxy. To do this, edit the file /etc/default/haproxy and change ENABLED from 0 to 1: /etc/default/haproxy

# Set ENABLED to 1 if you want the init script to start haproxy.
ENABLED=1
# Add extra flags here.
#EXTRAOPTS="-de -m 16"

Now we can restart the services:

service keepalived restart
service haproxy restart

Auto start after reboot: Edit Default /etc/default/haproxy

# Set ENABLED to 1 if you want the init script to start haproxy. 
ENABLED=1

Edit Init job: /etc/init.d/haproxy

HAPROXY=/usr/sbin/haproxy 
EXTRAOPTS= 
ENABLED=1